Home
/ How To Build A Balloon Car : Use a pen and ruler to draw the rectangle first.
How To Build A Balloon Car : Use a pen and ruler to draw the rectangle first.
How To Build A Balloon Car : Use a pen and ruler to draw the rectangle first.. Students number the steps and make a diagram and write a description for each step, showing how they made their balloon cars. When you tape the balloon to a straw and attach it to the body of your car, however, you can control the direction of the. Making a wide lightweight car makes the structure more stable and prevents it from falling over. Scissors, marker, cup, tape, cardboard from a cardboard box, wooden skewer or chopstick, plastic straw, tape measure or ruler, balloon build time: Then, put a few blocks at the back of your cars to hold the balloon straw ensemble.
We made this simple, two wheeled wagon. When you inflate a balloon and let it go, it zips randomly around the room. This activity can be used to help teach kids how wind energy can be used to propel an object, as well as other principles in. You can start by mounting the wheels on this body. Balloon powered car design another style of balloon cars, for this one, first use your imagination to construct lego cars in various designs.
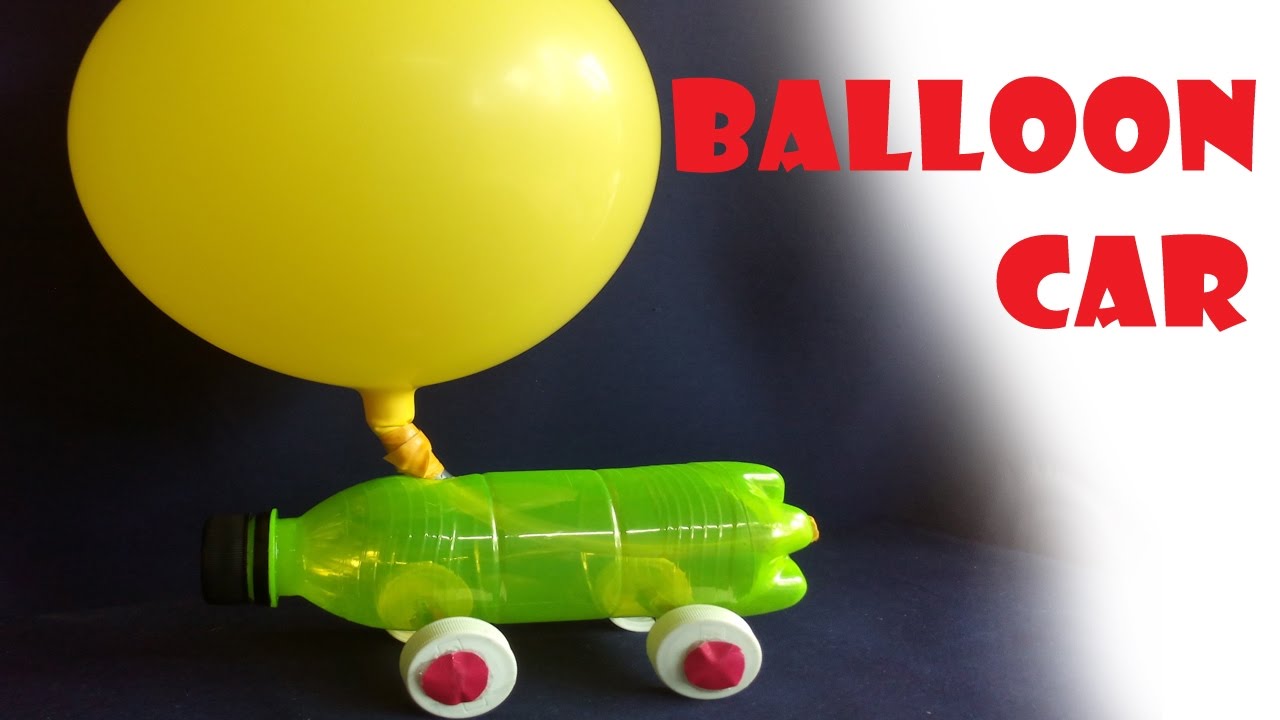
How To Make A Balloon Car With A Water Bottle Easy Homemade Balloon Car Youtube from i.ytimg.com Assign a starting line for your car. Let's build a balloon powered car! How to build a simple balloon car or newton vehicle from common household items. Press the free end of the straw through the small hole and out the mouth of the bottle. If you'd like to have a sturdier car, you can use plastic cap wheels instead. The body of the car (piece of cardboard or plastic bottle in figure 1) Minimize drag and reduce weight to make the car go faster. Cut out the circles, being careful with the scissors.
Build lego cars that really go!
We love simple lego building ideas! The car is then working and moving speedily. Minimize drag and reduce weight to make the car go faster. Wrap the rubber band around the neck of balloon and straw until secure. Estimate the distance your balloon car traveled. Therefore, you need to blow some air into the balloon through the straw, squeeze the straw, place the car on a smooth and flat surface, and then let go of the straw. Create the car body using a box sized to: The stored air in the balloon pushes through the straw, creating thrust—the force that pushes the car forward. Assign a starting line for your car. The water bottle forms the chassis, or body, of your balloon car. Now carefully blow up the balloon through the straw, pinching the straw so that air doesn't escape. Grab the balloon and place it over the neck to the end of the straw. When you inflate a balloon and let it go, it zips randomly around the room.
So when air from the balloon moves in one direction, it pushes the car in the opposite direction. Scissors, marker, cup, tape, cardboard from a cardboard box, wooden skewer or chopstick, plastic straw, tape measure or ruler, balloon build time: Combine simple science and engineering for stem activities that will provide hours of fun and laughs! We love simple lego building ideas! Blow the balloon up through the straw to make sure there are no leaks.
Make A Balloon Car Youtube from i.ytimg.com Let's build a balloon powered car! Press the free end of the straw through the small hole and out the mouth of the bottle. If you'd like to have a sturdier car, you can use plastic cap wheels instead. Wrap the rubber band around the neck of balloon and straw until secure. If you found this video helpful, please leave me a comment to let me know. After students have finished writing, demonstrate how to test an instruction manual. Balloon car to start with you only need a couple simple supplies: 1) use a ruler to keep them at the same position on each side.
Lego building is so entertaining and this easy to make lego balloon car is a perfect example of how wonderful lego play is for kids {and adults}.
Combine simple science and engineering for stem activities that will provide hours of fun and laughs! Try your hand at engineering design and learn about a simple machine (wheel and axle); Cut a 5 piece of paper straw. Tape the straw so it points backwards, not down. Blow the balloon up through the straw to make sure there are no leaks. Two things to keep in mind: Press the free end of the straw through the small hole and out the mouth of the bottle. How to build a simple balloon car or newton vehicle from common household items. Now carefully blow up the balloon through the straw, pinching the straw so that air doesn't escape. Grab the balloon and place it over the neck to the end of the straw. The stored air in the balloon pushes through the straw, creating thrust—the force that pushes the car forward. How to build a balloon car you will need: Use a pen and ruler to draw the rectangle first.
Explore the physics of motion; Run four more trials to get specific outcomes. Wrap the rubber band around the neck of balloon and straw until secure. Cut a small hole (big enough for the straw) in the top of the car. The car is then working and moving speedily.
How To Make A Balloon Car With A Water Bottle Easy Homemade Balloon Car Youtube from i.ytimg.com This video is an introduction to the balloon car lesson plan from science buddies. How to build a simple balloon car or newton vehicle from common household items. This activity can be used to help teach kids how wind energy can be used to propel an object, as well as other principles in. Cut out the circles, being careful with the scissors. Your balloon car uses jet power to move. Tightly wrap a rubber band around the neck of the balloon. If you'd like to have a sturdier car, you can use plastic cap wheels instead. Tape the straw so it points backwards, not down.
Scissors, marker, cup, tape, cardboard from a cardboard box, wooden skewer or chopstick, plastic straw, tape measure or ruler, balloon build time:
The car is then working and moving speedily. So when air from the balloon moves in one direction, it pushes the car in the opposite direction. Assign a starting line for your car. Let's build a balloon powered car! Use a pen and ruler to draw the rectangle first. Lego building is so entertaining and this easy to make lego balloon car is a perfect example of how wonderful lego play is for kids {and adults}. Use the cup to trace four circles onto a piece of cardboard. Now carefully blow up the balloon through the straw, pinching the straw so that air doesn't escape. Cut a small hole (big enough for the straw) in the top of the car. This video is an introduction to the balloon car lesson plan from science buddies. Balloon car to start with you only need a couple simple supplies: When you inflate a balloon and let it go, it zips randomly around the room. 1) use a ruler to keep them at the same position on each side.